
Custom Shower Enclosures in Redmond, OR
Our Trusted Vendors
10+
Years of
experience
Choosing The Perfect Shower Enclosure For Your Home
Shower Installation Services
Last updated: October 2026
A custom shower enclosure is a glass layout designed around your actual bathroom instead of a stock kit. Panels, doors, angles, heights and hardware are specified for your walls and tile, then cut and tempered to fit. Glass Daddy Redmond builds alcove, corner, walk in, neo angle, steam and curbless enclosures across Central Oregon.
If your project is a single hinged door on a standard opening, our guide to frameless shower doors in Redmond is the better starting point. This page is for the larger and more particular jobs: showers with more than one glass plane, odd shapes, steam, no curb, or walls that are not square. It also covers the part most homeowners do not hear about until late, which is how the glass fits with tile and waterproofing.
-
![Electrical Install at Open space]()
-
![Electrical Install at Office]()
-
![A large, white, multi-story building featuring classical columns, a triangular pediment, and a grand entrance with stairs.]()
Recent Projects
Contact UsEvery project comes with its own needs and challenges. Tell us your priorities, and we'll fill them to your satisfaction.
-
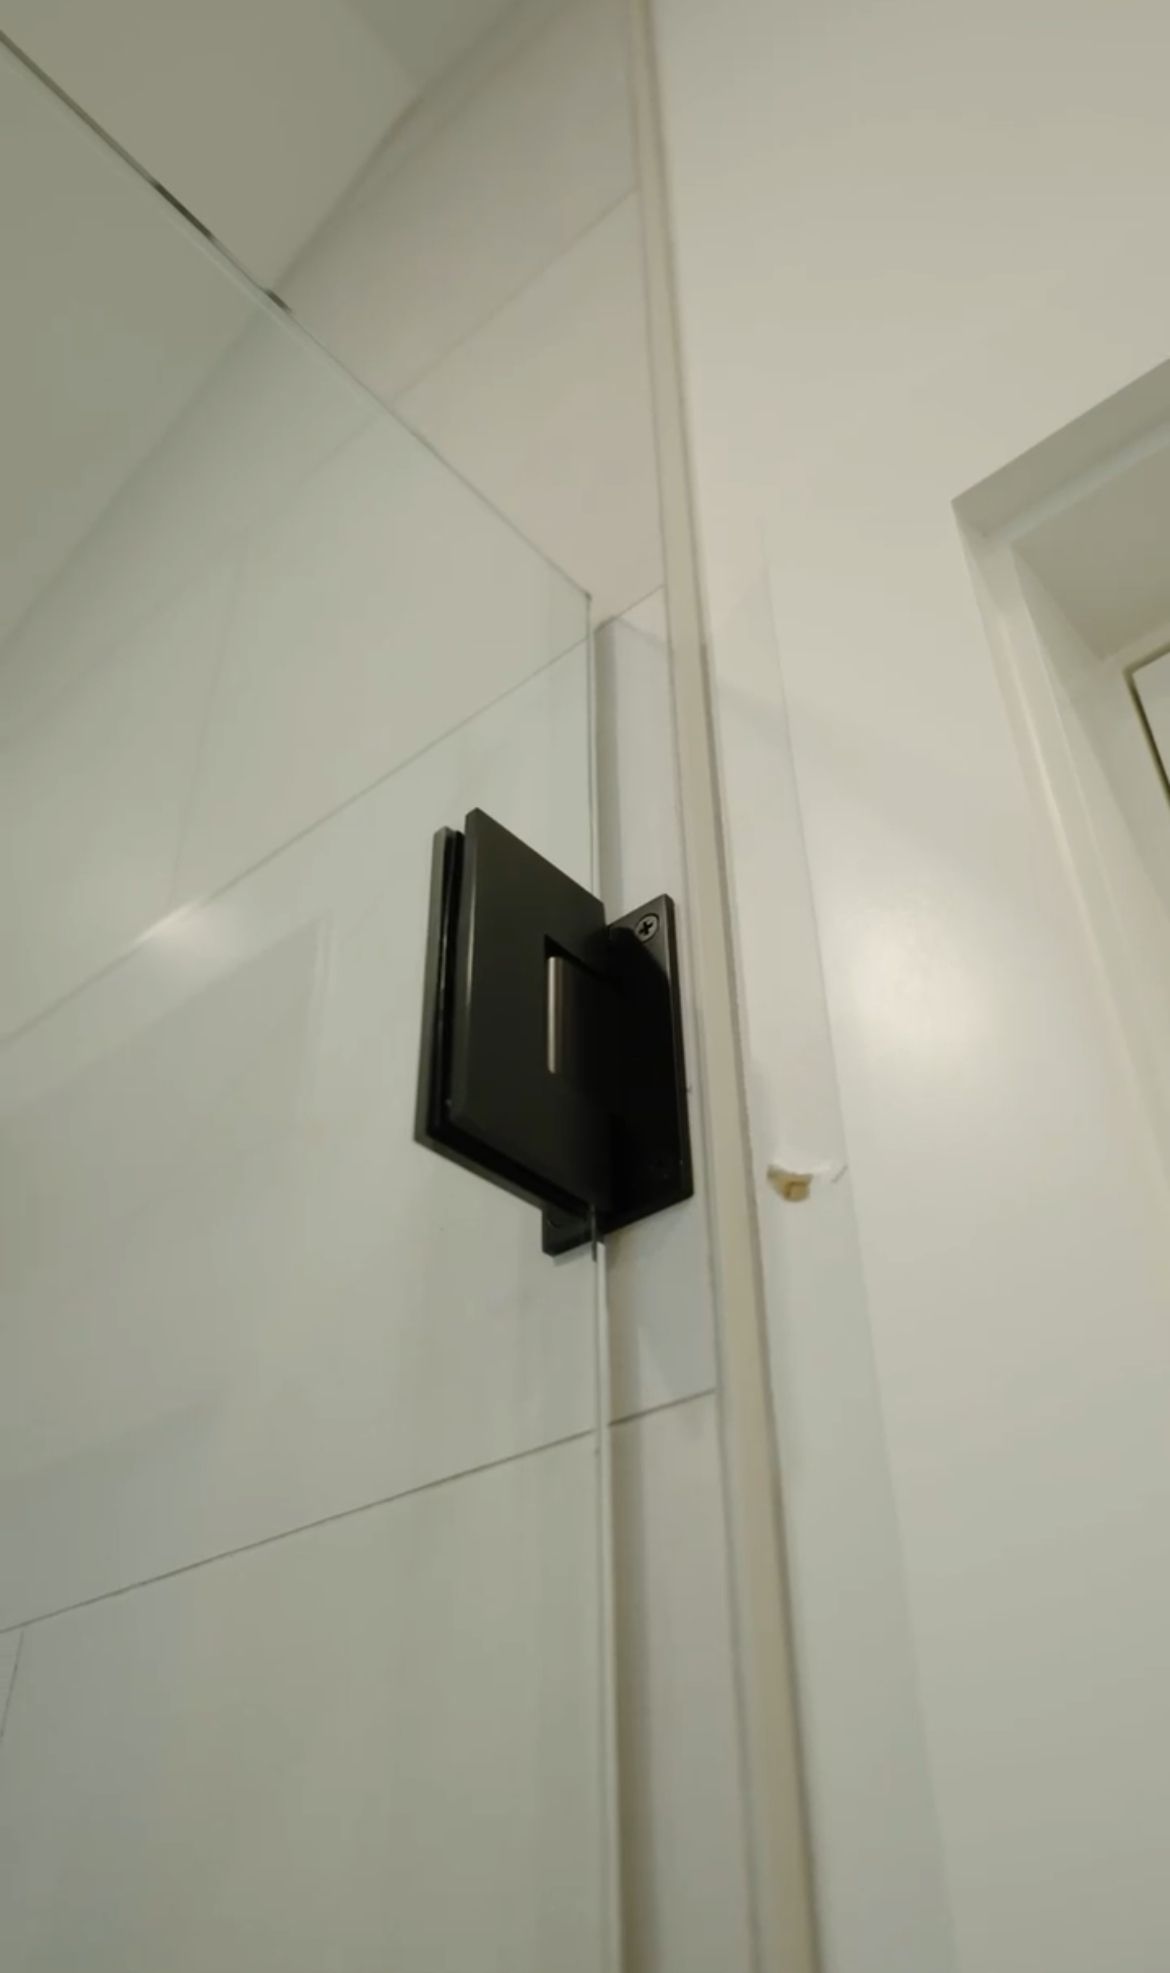
![A black metal hinge attaches a glass shower door to a white tiled wall in a bathroom.]()
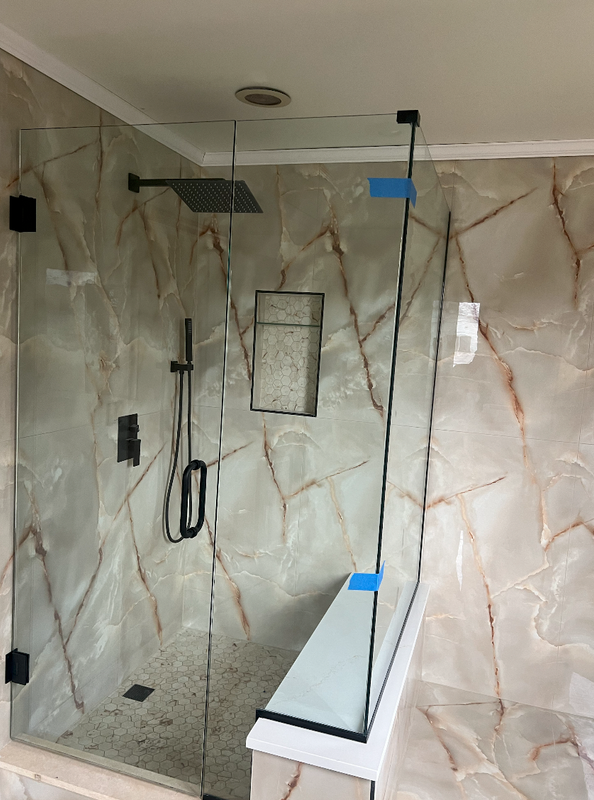
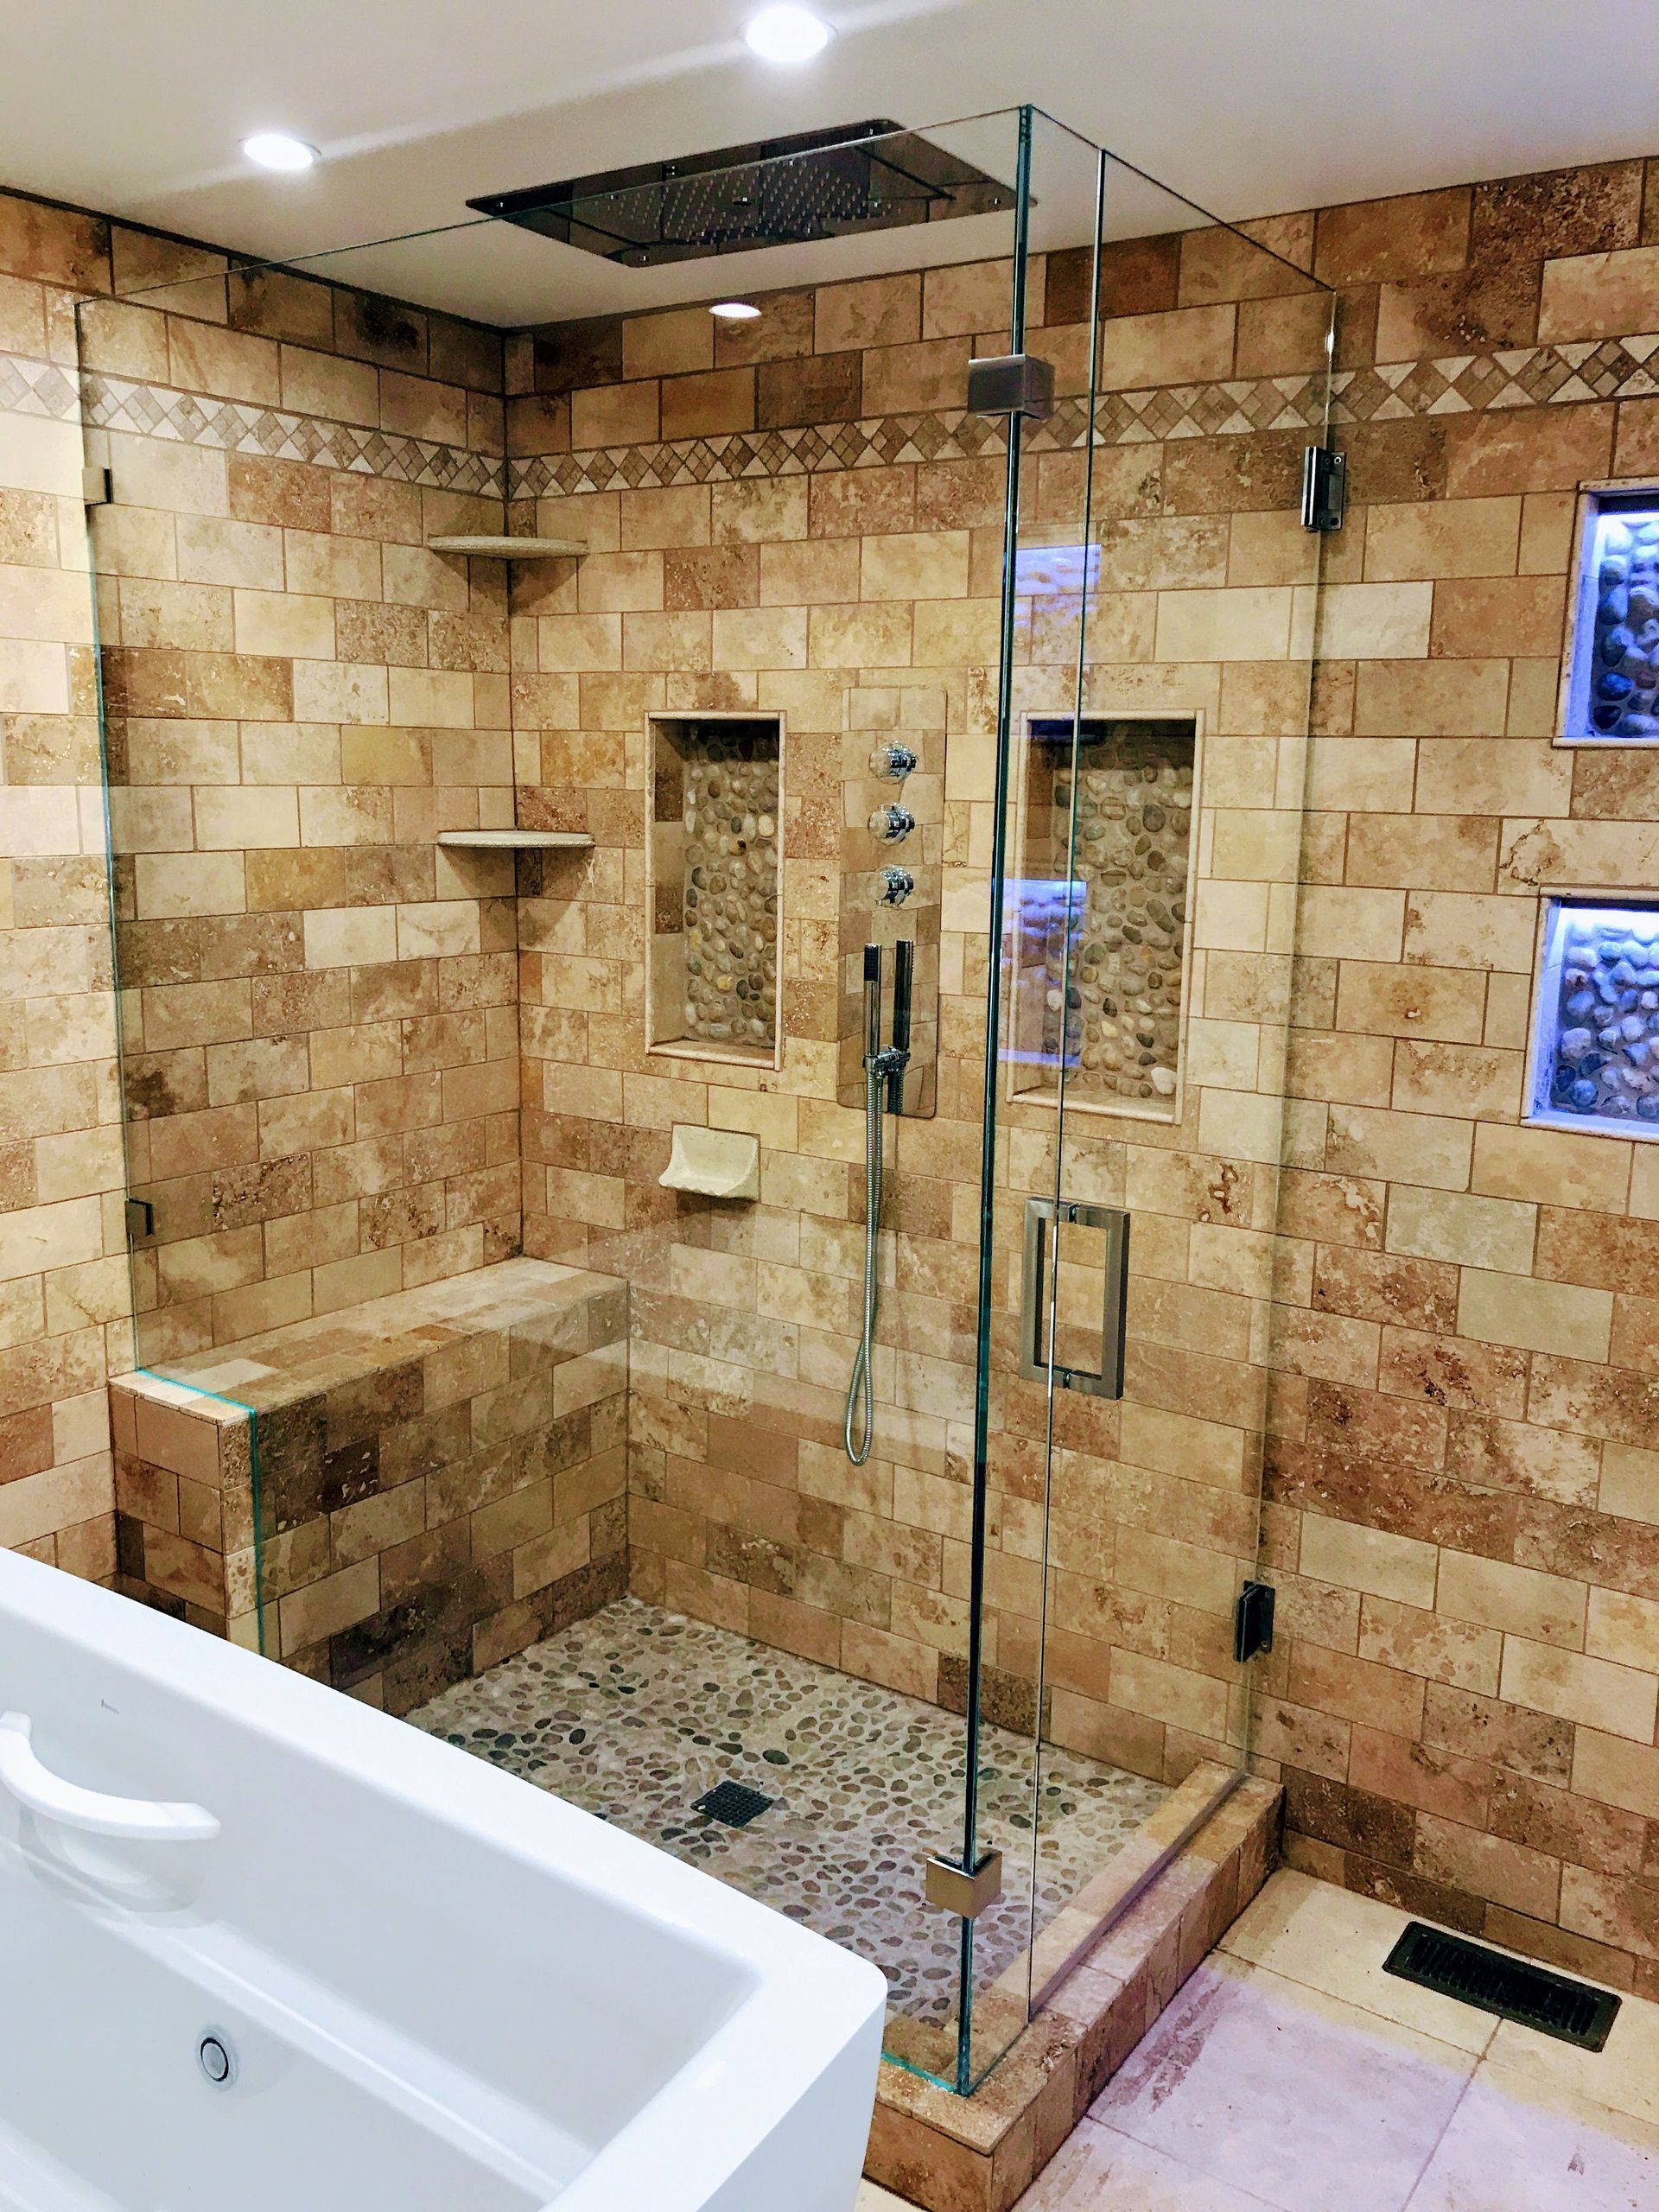

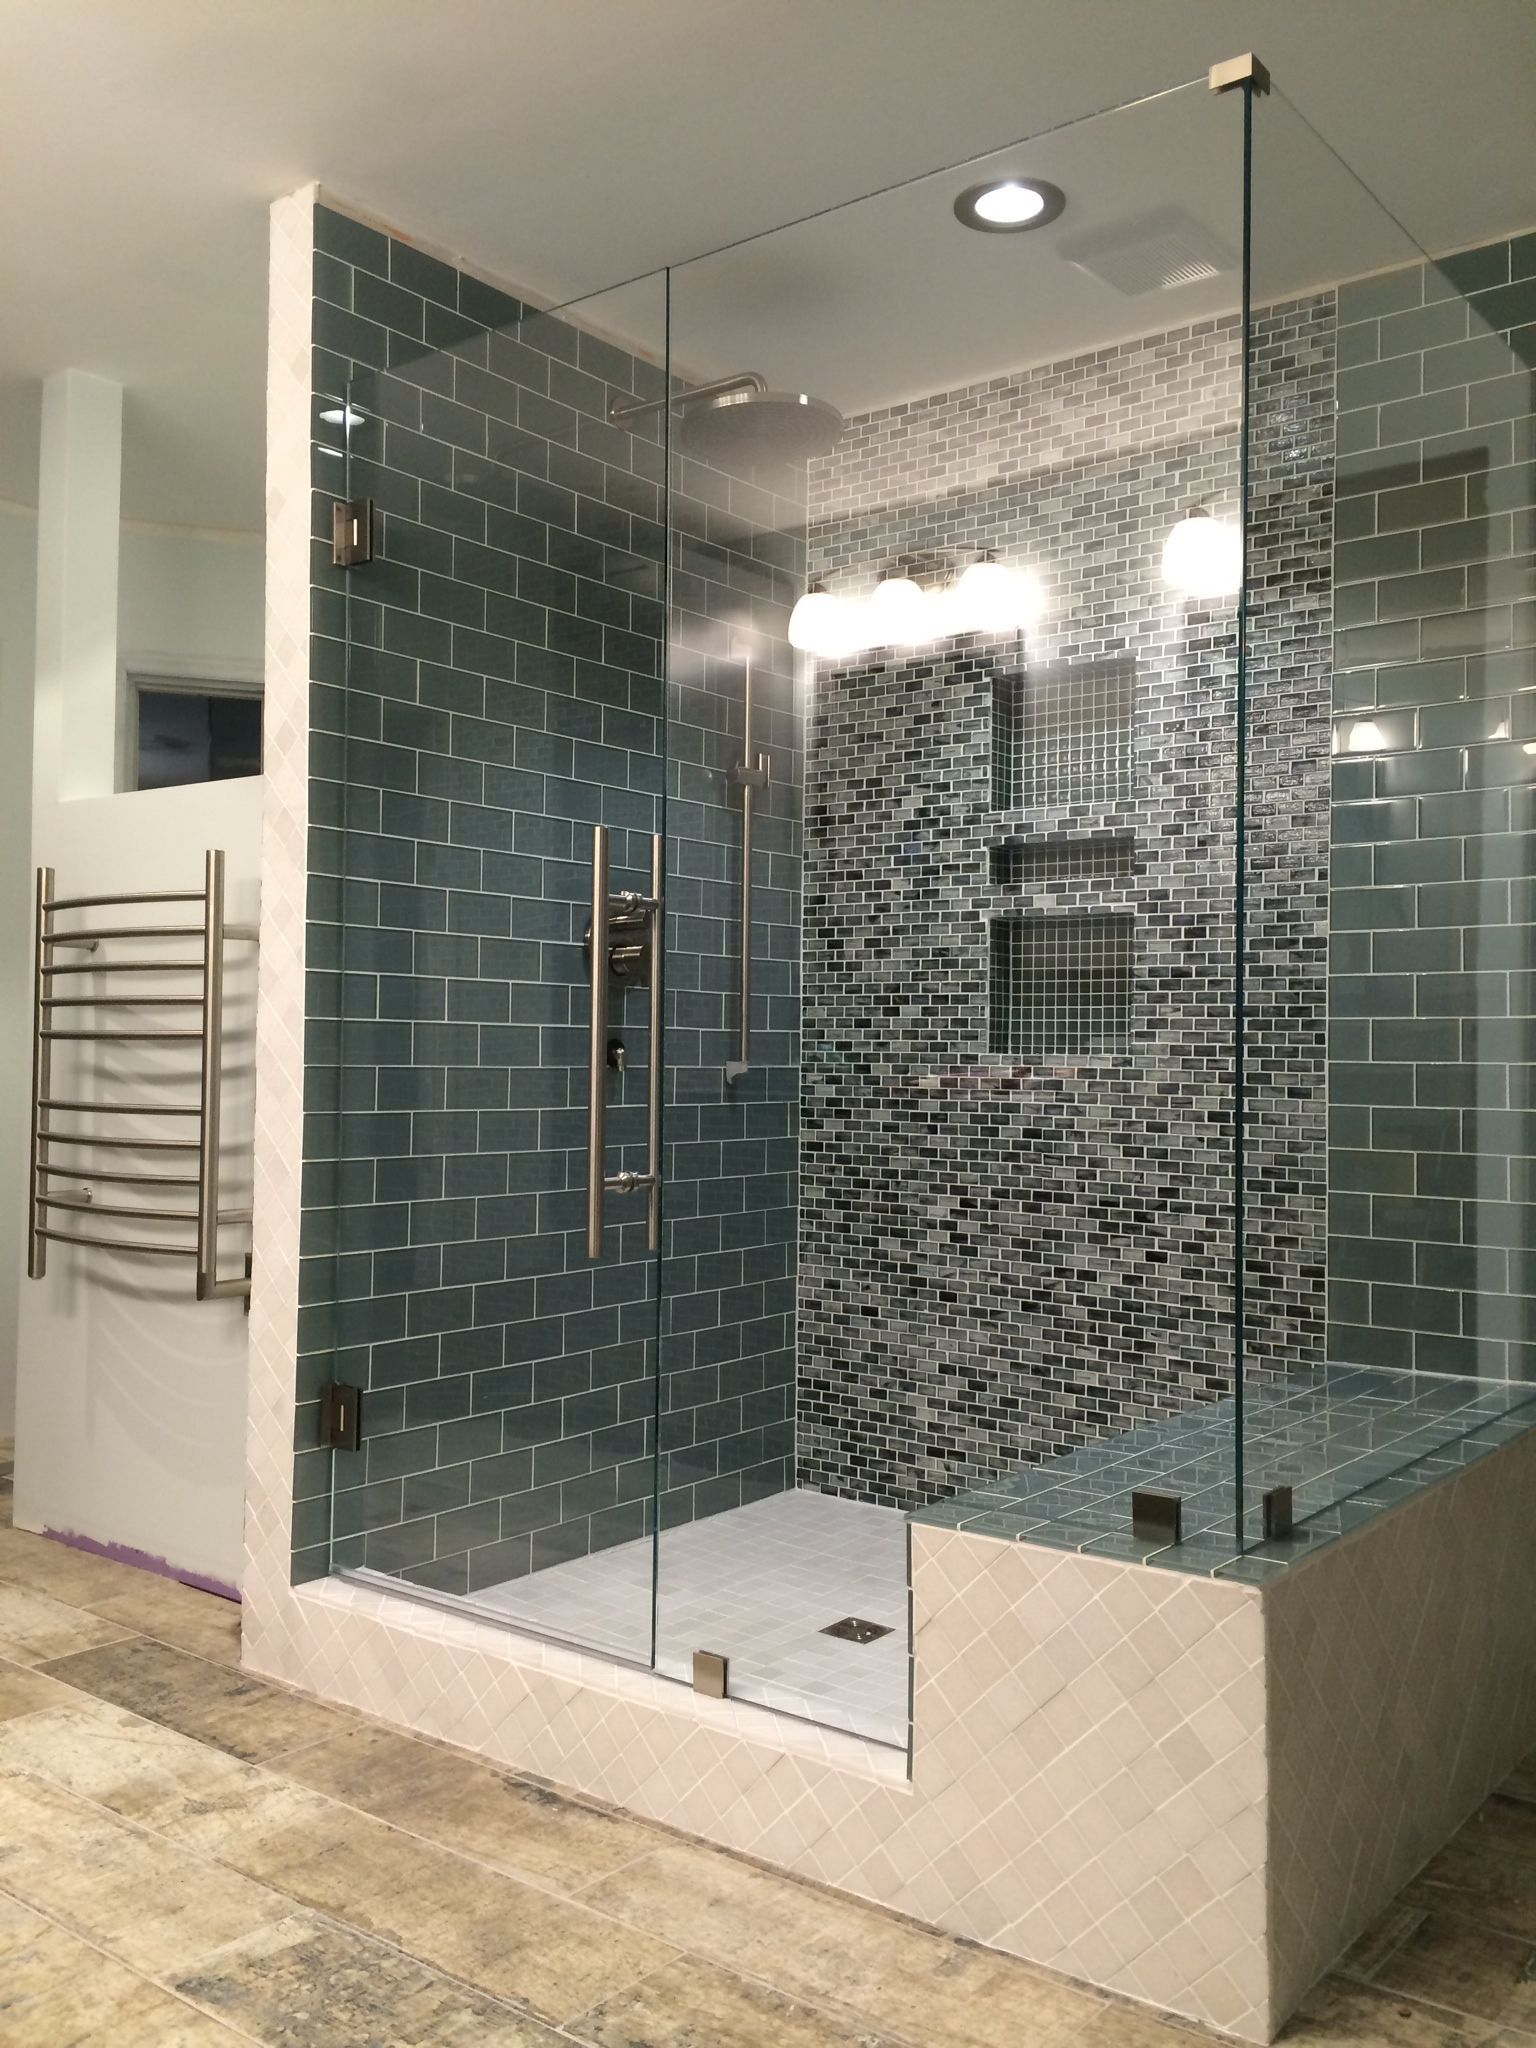
What Makes a Shower Enclosure Custom?
An enclosure is custom when the glass is dimensioned, shaped and hardware matched to your shower after the walls and tile are finished, rather than ordered from a fixed size catalog. Custom work covers odd widths, angled layouts, tall panels, transoms, and showers where nothing is perfectly square or plumb.
Stock and standard kits come in set sizes with adjustable frames. They are fine for many bathrooms and they have a place. The trouble starts when your opening falls between sizes, when the shower is a corner or angle layout, when you want ceiling height glass, or when the tile work is something you want on show. At that point, you want glass sized to your shower, not a kit stretched to fit it.
Everything we install is tempered safety glass, made to meet the safety glazing rules in CPSC 16 CFR 1201 and ANSI Z97.1. Tempered glass cannot be trimmed or drilled after it is made, which is why custom work is always measured on site, after the tile is set, and ordered to those numbers.
Who tends to choose custom
Most of our custom enclosure work comes from three situations. Homeowners in Redmond remodel a primary bath and want a walk in layout with a clean glass line. Owners of older ranch homes in Prineville and Sisters are replacing a tub with a shower and need glass that works with an awkward footprint. And owners of newer homes want a steam shower or a bench and niche layout that stock kits simply do not cover.
Enclosure Shapes: Alcove, Corner, Walk In and Neo Angle
The four most common custom enclosure shapes are alcove, corner, walk in and neo angle. Alcove showers sit between three walls, corner showers sit in a corner with two glass sides, walk in showers use a fixed panel with no door, and neo angle showers cut across a corner at 135 degrees. Each solves a different space problem.
Alcove enclosures
An alcove shower sits between three walls, with one open face for glass. It is the most common layout in Central Oregon homes, found in both older ranch bathrooms and new construction. The glass is usually a door and panel, an inline set, or a double door, depending on the width of the opening.
Custom alcove work comes into play when the opening is unusually wide, when there is a bench or knee wall to work around, or when the owner wants a taller panel for better spray control. Alcoves are also where a lot of tub to shower conversions end up, and where out of square walls show up most often.
Corner enclosures
A corner enclosure uses two walls and two glass sides, often a fixed panel meeting a door at a right angle. It suits a shower stall tucked into the corner of a bathroom, with a base that may be square or rectangular. The glass meets at a 90 degree joint, held with a clear corner clamp, a glass to glass hinge or a channel.
The main design question is where the door swings and where the seam falls. A seam in the middle of your view can look busy, so we often move the door to the side that faces the room and keep the long fixed panel as clean as possible. Corner layouts depend on accurate squareness at the joint, so they reward careful measuring.
Walk in panel showers
A walk in shower is open on one side, with a fixed glass panel, or two, and no door. It is a popular choice for primary bathrooms and for homeowners who want easy access. It also makes a small bathroom feel bigger because the line of sight is clear.
The one thing to understand is spray. Without a door, water can reach the floor outside the shower if the layout is wrong. A panel that is too short, an opening that faces the showerhead, or a shower that is too small will splash. As a rule of thumb, a fixed panel around 30 to 36 inches wide, a showerhead that points away from the opening and a shower floor that slopes back toward the drain keep most of the water where it belongs. Larger bathrooms with deeper showers can use a narrower opening, since there is more distance for the water to travel.
Walk in showers in Central Oregon also deal with winter. A shower with no door can feel cooler in a cold bathroom, so some owners add a short return panel, run a heated floor, or choose a layout where the opening faces away from an exterior wall. These are small design decisions that make a big difference to comfort.
Neo angle enclosures
A neo angle enclosure cuts across a corner with a diagonal front, usually at 135 degrees, using two fixed panels and a door in the middle. The base is a corner shape with five sides, which saves floor space compared with a square corner and gives the door room to open without hitting a wall.
Neo angle layouts suit smaller bathrooms and older homes where a standard stall was the norm. They also suit owners who want a shower that feels open without a full walk in. The tradeoff is more glass seams and more hardware, which means more to clean. If a neo angle is in your plans, we will talk through the cleaning routine and whether a protective coating makes sense for your water.
Steam Enclosures with Transoms
A steam shower enclosure is a fully sealed glass room, usually with a glass transom above the door and a ceiling that holds heat and moisture. The glass must be sealed on all sides, and the transom lets you vent steam when you finish. It takes planning with your tile setter and plumber well before the glass is ordered.
A steam shower is not simply a shower with a generator added. It is a closed room that holds hot vapor, and every part of the structure has to be designed for that. The ceiling is normally full height, sloped slightly so condensation runs down the walls instead of dripping on you, and finished with the same waterproof system as the walls. The glass is sealed to the walls, ceiling or curb at every edge, with a door that closes tightly.
Why a transom matters
A transom is a glass panel above the door, either fixed or operable. In a steam shower it does two jobs. It closes the enclosure all the way to the ceiling, and, when it is operable, it lets you vent steam and humidity once you are done. A fixed transom also works if the room has a good exhaust fan, but an operable one gives you more control. The transom is usually mounted on pivot hardware or hinges at the top, and it needs enough clearance to open without hitting the ceiling or a light.
Glass and hardware for steam
Steam showers need hardware rated for heat and moisture, with seals that can handle repeated cycles. Door sweeps are used at the bottom, and the door may need a tight seal at the jamb. Hardware finishes should hold up in humidity, and we steer owners away from finishes that tend to spot or tarnish quickly. Because the glass runs to the ceiling, it is tall and heavy, so the hardware and the wall backing both need to carry that load.
What to settle before glass is ordered
- The height of the finished ceiling, including tile and any trim.
- Where the steam head, controls and any bench or niche are located.
- Whether the transom should open, and which way.
- Where the exhaust fan sits, and whether it moves enough air for the room.
- Whether the glass will land on a curb, a flat threshold or a curbless floor.
Steam equipment uses electricity, and a ventilated bathroom helps protect the rest of your home from moisture. The U.S. Department of Energy has general guidance on managing moisture and ventilation at home. Your plumber and electrician handle the steam generator, and we handle the glass that has to match the room they create.
Curbless Showers and Glass
A curbless shower has a floor that runs flat into the bathroom with no raised step, sloped gently to a drain. Glass in a curbless shower is usually a fixed panel or a door with a sweep, set so water stays inside. It looks open and makes access easier, but it demands careful floor slope and panel placement.
Curbless layouts are popular with owners who plan to stay in their homes for years, and with anyone who wants a smooth entry. They are also a design choice that looks very clean with a walk in panel. But curbless showers raise the stakes on planning, because there is no curb to hold water back.
Floor slope and drain placement
Water has to flow to the drain, not out the door. That means the floor needs a consistent slope toward the drain, and the drain location has to suit the glass. A linear drain along the wall or at the threshold, or a center drain with a floor that slopes in from all sides, are both common. The slope is set by the tile setter, and we need to see it before we set the glass. If the floor slope is poor, glass will not fix it.
Glass layouts that work without a curb
- A fixed panel with no door, where the shower is deep enough to keep spray inside.
- A door with a sweep and a slightly raised threshold strip, where the flat floor still slopes inward.
- A panel set into a shallow recess or a small tile transition, which acts as a gentle water stop.
Gap and threshold details
With no curb, the bottom of the glass sits close to the floor. A small gap is normal, and a bottom sweep or seal can cover it if there is a door. We set the gap based on the floor slope and the tile, and we avoid leaving a space where water runs out. Sometimes a very shallow threshold, only a fraction of an inch, is the best compromise. It keeps water in without giving up the open look.
Planning with your builder
Curbless showers are a decision made at the start of a remodel, not the end. The floor framing, the waterproofing and the drain all change. If you are planning one, bring us into the conversation before tile starts, so the glass and floor are designed together. It saves a lot of rework.
Out of Square Walls and Imperfect Openings
Out of square walls are common in Central Oregon, especially in older ranch homes and in houses where framing has settled. A custom enclosure handles them by measuring at several heights, templating the glass or using adjustable hardware, and choosing a layout that hides small gaps. Large errors are fixed in the walls before glass is ordered.
No wall is perfect. Builders work within tolerances, tile adds its own variations, and houses move over decades. The question is how much, and what to do about it. A wall that leans a quarter inch over the height of a door is normal. A wall that leans an inch is a problem for a frameless enclosure, because the glass is rigid and will not follow the wall.
How we measure
We measure width at the top, middle and bottom of each wall, check height at both ends, and use a level and a square to see how far the walls lean and how far corners are from 90 degrees. We also measure diagonals on corner and neo angle layouts. These numbers tell us whether the opening is square, how far out it is, and which hardware can absorb the difference.
Ways to work with an imperfect opening
- Choose a U channel or a clamp style that allows for small adjustments.
- Use shims behind brackets to bring hinges into alignment.
- Fill small gaps with clear silicone or a vinyl seal, sized for the actual space.
- Order glass cut to the narrowest dimension, then make up the difference with seals.
- For larger errors, order a template or a cut that follows the wall.
When to fix the wall first
If a wall is badly out of plumb, or a curb is not level, a better answer is sometimes to correct it before we install. A tile setter can often add a layer of mortar or reshape the curb. It costs a little more up front, and it gives a better result than trying to bend glass to a crooked space. We will tell you honestly if we think that is the better path.
Temperature and movement
In Central Oregon, a bathroom on an exterior wall can swing a long way between a cold January night and a hot shower. Wood framing, tile, glass and silicone all move a little. We leave small, deliberate gaps and use flexible seals so the glass has room, and so it does not crack at a corner or bind against the wall.
Tile and Waterproofing Coordination
The glass goes in last, after tile, grout and waterproofing are finished, but it has to be planned first. Hinge and clamp locations, curb height, tile thickness and wall backing all affect how the glass attaches. Telling your tile setter and contractor what the glass needs avoids drilled leaks and rework.
A shower is a waterproof box. A membrane under the tile, whether it is a sheet or a liquid applied product, keeps water from reaching the framing. Every hole in tile is a possible entry for water if it is not sealed properly. Glass hardware needs holes, or at least fasteners, in the tile or the wall behind it. So the glass installer and the tile setter should be talking before either one starts.
Wall backing and anchor points
Heavy glass needs solid support. We prefer hinges and clamps to land on studs, or on blocking added during framing. If the tile setter knows where the glass hardware goes, backing can be added before walls are closed up. If not, we use appropriate anchors for the wall type and avoid placing hinges where the backing is weak.
Tile thickness and layout
Tile thickness changes the finished opening. Large format porcelain, stone, glass tile and mosaics all differ. Grout lines can fall where a clamp wants to sit. We take our numbers once the tile is up rather than from plans, and we try to coordinate so a clamp does not land on a grout joint or a decorative border. A small shift in tile layout is easy early on. It is hard after the fact.
Curb height and slope
On a curb shower, the top of the curb should be level across the width and slope slightly inward. The tile on the curb top should be flat and even, so a sweep or a glass bottom seats cleanly. A wide curb gives the glass more bearing, but a narrow curb looks more modern. We have worked with both and we will tell you what the glass needs.
Sealing penetrations
Holes in tile for hinges, clamps and handles are sealed with silicone and the right fasteners. We use the correct bit for the tile, drill carefully to avoid cracking, and seal each hole so water does not wick behind the tile. The membrane behind it stays protected as long as nobody drills where they should not.
Timeline for a remodel
- Framing and backing: tell us hinge and clamp locations.
- Waterproofing and tile: confirm curb height, slope and any benches or niches.
- Grout and cure: allow time before glass is installed.
- Glass measure: we measure after the tile is set and cured.
- Glass install: usually a few weeks after the measure, once the glass arrives.
If you are the homeowner acting as your own general contractor, our team can walk through the schedule with you. Bringing us in early is a cheap way to prevent expensive problems.
Design Choices: Glass, Hardware and Layout
The main design decisions in a custom enclosure are glass type, glass height, hardware style and finish, and how the layout reads from the room. Clear low iron glass shows tile best. Matte black hardware suits a modern look. Full height panels feel substantial. Small details like handle shape and seal color change the whole impression.
Clear, low iron, frosted and textured glass
Clear glass is the standard and works for most showers. Low iron glass removes the green tint from the edge and looks closest to colorless, which suits white and light tile. Frosted and etched glass add privacy for a bathroom that faces a neighbor. Reeded and textured glass add character while softening what you can see through. Each affects price, and you can see how in our shower door cost guide .
Glass height
Standard panels run roughly 72 to 80 inches. Some designs go to the ceiling, which suits steam and gives a dramatic look, while others stop short for ventilation. In a walk in layout, the panel height affects both the look and the spray. In most Central Oregon bathrooms with eight foot ceilings, a panel between 78 and 84 inches reads well and keeps the glass in proportion to the room.
Hardware style and finish
Hardware choices in a custom enclosure include hinges, clamps, support bars, handles and header bars. Choose a finish that matches your plumbing fixtures where you can. Brushed and matte finishes are easier to keep looking clean in hard water areas than polished ones. Matte black is popular and reads as modern. Brushed nickel and chrome stay neutral. Gold and brass tones suit warmer designs.
Support bars and stability
Large fixed panels often need a support bar from the glass back to the wall or to the ceiling. A support bar adds stability and reduces flex, and it can be placed to feel intentional rather than an afterthought. In a minimal design, we may use a thicker glass instead, which can allow a panel to stand without a bar.
Benches, niches and built ins
If your shower has a bench or niche, the glass has to land cleanly around it. A bench can interrupt a bottom sweep or change where a panel sits. We can adjust the glass layout so the bench is inside the enclosure, or outside it, whichever suits your use. Sharing your tile plan early helps us propose layouts that work with these features.
Coatings and care
A glass coating cuts down how much water clings to the surface, which matters in Central Oregon where hard water leaves spots. It does not remove the need to clean, but it makes the job faster. Ask about it during your estimate. Dust and wildfire smoke can also leave a film on glass in summer, which a soft cloth removes.
How Custom Enclosure Projects Work
Custom enclosure projects follow five steps: consultation, measurement, fabrication, installation and a final walkthrough. Most of the calendar time is spent waiting for tempered glass to be made. The numbered steps below show what happens and when we need decisions from you.
- Consultation. Phone (541) 527-7080 or use the free estimate form . Tell us about your layout, whether you want a walk in, neo angle or steam design, and what stage your remodel is at.
- Measurement. We visit your home, measure at multiple heights, check squareness, plumb and level, note wall backing, curb height or floor slope, and confirm glass and hardware choices.
- Fabrication and ordering. We send you a written quote and drawing. After you approve, we order tempered glass and hardware cut to your dimensions. This usually takes a few weeks.
- Installation. Our team sets the glass, installs hardware, seals joints and adjusts doors, panels and transoms so everything is aligned and watertight.
- Final walkthrough. We test doors and sweeps, explain care and cleaning, and confirm you are happy with the finished enclosure.
You can sketch your layout first with the online shower builder . It helps us start the conversation with the right shape and size in mind.
Typical Custom Shower Enclosure Costs in Central Oregon
Custom prices depend on shape, glass area, thickness and hardware. As typical estimates, a walk in panel often runs $900 to $2,500, an alcove or corner enclosure runs $1,500 to $3,800, a neo angle enclosure runs $1,800 to $4,500, and a steam enclosure with a transom runs $3,000 to $7,000 or more. Final price follows an in home measure.
Several choices move the number up or down:
- More glass, more seams and more hardware raise the price.
- Thicker glass and low iron glass cost more than standard clear.
- Ceiling height panels and transoms add glass and hardware.
- Out of square walls and difficult access can add labor.
- Curbless layouts may need special sweeps or custom cut glass.
- Coatings and specialty finishes add a modest amount.
Remodel costs outside the glass, such as tile, waterproofing, plumbing and steam equipment, are separate and are usually larger than the glass itself. If you are building a budget, give the glass its own line item, and add a cushion for surprises behind the walls. Energy Trust of Oregon at energytrust.org lists incentives for some efficiency upgrades, which may apply if your remodel includes new water heating or other home upgrades.
Plan Your Custom Shower Enclosure in Redmond
Our team brings 10+ years of experience to homes in Redmond, Sisters, Prineville and the rest of Central Oregon. We measure in person, order glass made to your shower, and install it with the tile and waterproofing in mind. Custom work takes planning, and we are glad to start early with you and your contractor.
Call (541) 527-7080 orget a free estimateto talk through your project. You can look at finished work on oursee our work page, learn aboutglass services in Redmond, or see how our overall approach fits together in ourCentral Oregon shower installation guide. Replacing a tub with glass instead? Read aboutframeless bathtub enclosures. For quick answers on glass in general, ourglass FAQis a good place to start.
What our customers have to say...
Testimonials
Frequently Asked Questions
These are the questions we hear most about custom shower enclosures from Central Oregon homeowners. For answers on mirrors, windows and other glass, see our glass FAQ for Central Oregon homes .
What is the difference between a custom and a standard shower enclosure?
A standard enclosure comes in set sizes with adjustable frames. A custom enclosure is measured in your bathroom and made to fit your opening, with glass cut and hardware chosen for your layout. Custom is the better fit for odd sizes, angled layouts, tall panels, transoms and walls that are not square.
How wide should a walk in shower panel be?
A fixed panel around 30 to 36 inches wide works well for most walk in showers. The right width depends on shower depth, showerhead placement and the floor slope. Deeper showers can use a narrower opening. Shallow ones need a wider panel or a return panel to keep water from reaching the floor outside.
Do walk in showers without a door leak water?
They can if the layout is wrong. A walk in shower stays dry when the panel is wide enough, the showerhead points away from the opening, the shower is deep enough and the floor slopes to the drain. Poor placement is the usual cause of splashing, not the lack of a door.
What is a neo angle shower enclosure?
A neo angle enclosure cuts across a corner at 135 degrees, with two fixed panels and a door in the center. It sits on a five sided corner base. It saves floor space and gives the door room to swing, which makes it a good fit for smaller bathrooms and older homes.
Can you put a glass enclosure on a steam shower?
Yes. A steam shower uses a fully sealed glass enclosure, often with a transom above the door that can open to vent steam. The glass is sealed on all edges, and the ceiling is built and sloped to handle moisture. Your tile setter and plumber need to coordinate with the glass installer from the start.
Can glass be installed on a curbless shower?
Yes. Curbless showers use a fixed panel or a door with a sweep, set so water stays in. The floor must slope consistently to the drain, and the drain should be placed to suit the glass. Planning the floor and glass together before tile is installed gives the best result.
What if my shower walls are not square?
Out of square walls are common. We measure at several heights, check plumb and diagonals, and pick hardware and seals that absorb small differences. Larger errors may need the wall or curb corrected first, or glass cut to a template. We will tell you plainly which approach is best.
How long does a custom shower enclosure take?
From measure to install, a custom enclosure usually takes a few weeks, mostly waiting for tempered glass. Installation itself is often done in one visit, though steam and larger layouts can take longer. Timing depends on glass type, hardware and your remodel schedule, and we give you a realistic window with the quote.
Get In Touch With Glass Daddy Redmond
Ready for a custom frameless shower door or enclosure? Call (541) 527-7080 or request your free estimate today and we will schedule your in-home measure.